Send your program over NDI
NDI carries TCast's program video and audio over your local network to other software. Turn on the switch and your program shows up as a source in OBS, vMix, a TriCaster, or NDI Studio Monitor.
Everything needed to send NDI is built into TCast, so there's nothing extra to install on this Mac. You only need NDI support on the receiving side (see Receive the feed).
NDI is a Pro feature. On the free tier the switch is disabled and shows a Pro lock. See Licensing.
What you'll need
- The receiving computer (or app) on the same local network as TCast. It can be the same Mac.
- An NDI-capable receiver. Any of these will work:
Turn on NDI
Two places, one switch:
From the sidebar (fastest)
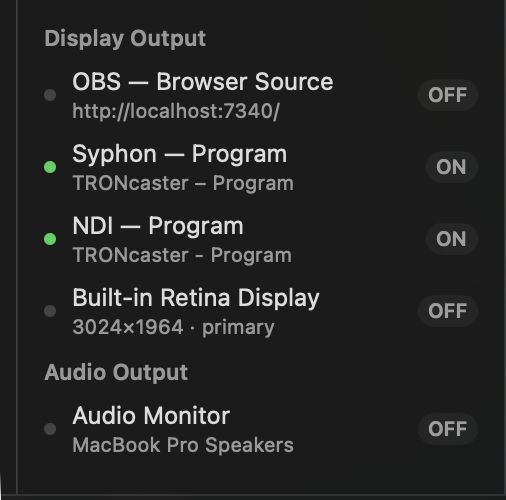
- Under Display Output, click the NDI — Program row. The label flips to ON.
From Settings
- Open Settings (the TCast ▸ Settings… menu, or press ⌘,).
- Select the Output pane.
- Under NDI Output, switch on Publish program over NDI.
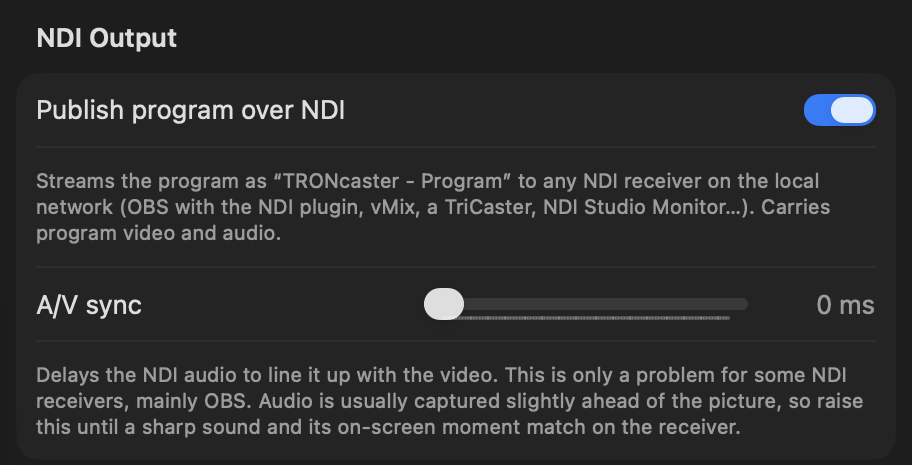
TCast now publishes an NDI source named:
TCast - Program
In receivers it usually appears under this Mac's name, for example YOUR-MAC (TCast - Program).
Receive the feed
NDI Studio Monitor (quickest test)
- Open NDI Studio Monitor.
- Click the menu (top-left, or right-click the window).
- Under your Mac's name, choose TCast - Program.
Your program appears immediately. I recommend making sure the feed works here before wiring it into a bigger setup.
OBS Studio
- Install the NDI plugin (DistroAV) if you haven't already.
- In Sources, click + ▸ NDI Source.
- Set Source name to TCast - Program and click OK.
Audio a little ahead of the video in OBS? OBS's NDI plugin can introduce a small audio-versus-video offset at its end even though the feed leaves TCast in sync. Use the A/V sync control below to nudge it back into line for OBS.
vMix
- Add Input ▸ NDI / Desktop Capture ▸ NDI.
- Pick TCast - Program from the list.
What gets sent
- The program exactly as shown in TCast.
- Video and audio together, in sync.
- Resolution and frame rate follow your Stage settings (Settings ▸ Output ▸ Stage). Change the stage and the NDI feed follows. 4K and custom sizes and rates are Pro.
NDI is a preview-side output, like the audio monitor. It publishes the program regardless of which physical displays you have open.
A/V sync (audio delay)
Most receivers play the feed in sync, so this sits at 0 by default. Some receivers, mainly OBS's NDI plugin, add a small delay that leaves the audio running slightly ahead of the picture. The A/V sync slider under NDI Output compensates by holding the NDI audio back:
- Open Settings ▸ Output ▸ NDI Output.
- Play something with a sharp, clearly-timed sound.
- Drag A/V sync up until the sound lands exactly on its on-screen moment in your receiver. In my experience the right value is small, usually tens of milliseconds.
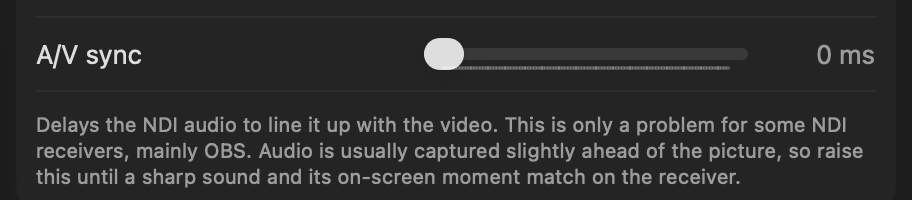
This affects the NDI feed only. Your local audio monitor and other outputs are untouched. If your receiver is already in sync, as NDI Studio Monitor generally is, leave it at 0.
NDI or Syphon?
NDI crosses the network and carries audio, which makes it the right choice for a second machine. If the receiving app is on this same Mac and you don't need audio over the link, Syphon has lower latency and is recommended.
There is a real cost to getting this wrong. NDI compresses every frame on the processor, and reading each frame back out of the GPU to hand it over is another full copy. Both happen whether the receiver is across the room or in another app on the same screen. Syphon shares the frame between apps on the GPU, so neither cost applies. On a 1080p60 program, running OBS on NDI rather than Syphon on the same Mac can be most of a processor core in each app. The documentation index has the full comparison.
Troubleshooting
The switch is disabled
- NDI is a Pro feature. See Licensing.
The source doesn't show up in my receiver
- Both machines must be on the same network and subnet. NDI discovery uses local multicast, and guest networks, VLAN isolation, or a VPN can block it.
- The first time TCast uses the network, macOS may ask for Local Network permission. Allow it (System Settings ▸ Privacy & Security ▸ Local Network ▸ TCast).
- Check the receiver's own firewall isn't blocking NDI.
It's connected but the picture is black
- Check something is actually on air in TCast. NDI sends whatever the program is showing, so if that's black, so is the feed.
Audio and video are out of sync
- See A/V sync. With OBS this is expected from the plugin. Dial in the slider.
The resolution or frame rate looks wrong
- The feed matches Settings ▸ Output ▸ Stage.